

Table of Contents
- Why DIY Natural Anti-Aging Face Masks Are Worth Trying
- Natural Ingredients for Aging Skin: What Works and What to Skip
- Homemade Face Mask Recipes for Mature Skin
- How to Mix, Apply, and Store Your Mask Safely
- How Often to Use a Face Mask for Best Results
- Face Mask Patch Test: A Step You Should Never Skip
- When to Choose a Ready-Made Anti-Aging Face Mask Instead
- Conclusion
- Frequently Asked Questions
Last Updated: October 6, 2026
Why DIY Natural Anti-Aging Face Masks Are Worth Trying
DIY natural anti-aging face masks give you fresh, simple skin care without synthetic additives.
At Ageless Glow, women in their 40s, 50s, and 60s want real results without a 10-step routine. A homemade face mask can hydrate, smooth, and brighten skin in 15 minutes.

But most guides get this wrong: a mask is a boost, not a cure.
Below: which ingredients help aging skin, which to avoid, three tested recipes, plus safety, storage, and how often to use a mask.
The American Academy of Dermatology's skin care guidance confirms that gentle, consistent care matters more than harsh treatments for mature skin.
Natural Ingredients for Aging Skin: What Works and What to Skip
Most DIY mask guides promise fewer wrinkles, firmer skin, and a glow, but rarely explain what a topical mask can actually do, and what it cannot.
A mask sits on your skin's surface for 10 to 20 minutes, long enough to:
- Hydrate the outer layer by pulling in and holding water, temporarily plumping fine lines.
- Soften and gently exfoliate dead surface cells, improving texture and brightness.
- Calm redness and irritation with soothing compounds.
What a mask cannot do in 15 minutes is remodel collagen, erase deep wrinkles, or lift sagging skin. Those changes require deeper-acting ingredients, retinoids, vitamin C, niacinamide, peptides, in-office procedures, plus daily sunscreen, the single most effective anti-aging step you can take.
Ingredients With the Best Support
- Honey, a humectant that draws water into the skin, with natural enzymes and mild antibacterial properties. Manuka honey is often cited for higher enzyme activity, though evidence for anti-aging effects is limited. Best for: dry, dull, or mildly irritated skin.
- Colloidal oatmeal, finely ground oats that form a protective barrier and contain avenanthramides, studied for reducing redness and itching. One of the few DIY ingredients with real clinical backing for soothing skin. Best for: sensitive, reactive, or eczema-prone skin.
- Yogurt, contains lactic acid, an AHA that gently dissolves dead surface cells. Plain, full-fat, unsweetened yogurt has the most; Greek yogurt is thicker but lower in it. Best for: dull, rough, or congested skin. Skip if sensitive to dairy proteins.
Ingredients That Sound Good but Disappoint
- Raw egg white, dries tight and feels firming, but the effect is temporary and it can be drying and irritating, especially on sensitive skin, with a small risk of bacterial contamination.
- Banana, mostly water and starch, offering little beyond light hydration.
- Coffee grounds, too abrasive for facial skin. Save them for your body.
Ingredients to Avoid on Facial Skin
Some kitchen ingredients are food-safe but not skin-safe. Skip these:
- Lemon and other citrus juices, highly acidic and phototoxic, increasing sun sensitivity and risking a blistering reaction after sun exposure.
- Baking soda, alkaline (around pH 9), it disrupts the skin's acidic barrier, leaving skin dry, red, and more vulnerable to irritation.
- Undiluted essential oils, potent allergens. If you use them, dilute to no more than 1% in a carrier oil and patch test first.
How to Choose Ingredients for Your Skin Type
Rather than treating every recipe as universally safe, match ingredients to your skin:
- Dry or mature skin: honey, avocado, rosehip oil, colloidal oatmeal
- Oily or congested skin: yogurt, colloidal oatmeal, a small amount of kaolin clay
- Sensitive or reactive skin: colloidal oatmeal, honey, and nothing else until you know how your skin responds
If you use prescription retinoids or acids, or have rosacea or eczema, ask a dermatologist before adding any new topical ingredient, some can interact with or compound active treatments.
Homemade Face Mask Recipes for Mature Skin
These three homemade face mask recipes for mature skin take under five minutes to mix and target firmness, hydration, and brightness.
Recipe 1: Honey, Yogurt, and Oatmeal Firming Mask
This mask supports firmness and smooths rough texture.
You need:
- 1 tablespoon plain Greek yogurt
- 1 tablespoon raw honey
- 2 tablespoons finely ground oatmeal
How to make it: Mash and combine all three into a thick paste, adding a splash of water if too dry.
How to use it: Apply an even layer, leave on for 15 minutes, then rinse with lukewarm water.
Recipe 2: Avocado and Rosehip Oil Hydration Mask
Our pick for dry, tight skin: avocado adds deep moisture and rosehip oil helps skin tone.
You need:
- 1/2 ripe avocado
- 1 teaspoon rosehip oil
- 1 teaspoon honey
How to make it: Mash the avocado, then mix in the oil and honey until smooth.
How to use it: Apply, leave on for 15 to 20 minutes, and rinse gently.
Recipe 3: Turmeric and Yogurt Brightening Mask
Turmeric helps even out skin tone and restore radiance.
You need:
- 1 tablespoon plain yogurt
- 1/4 teaspoon turmeric powder
- 1 teaspoon honey
How to make it: Combine everything into a smooth paste.
How to use it: Leave on for 10 minutes. Turmeric can stain, so rinse well and use an old towel.
How to Mix, Apply, and Store Your Mask Safely
Mix your mask in a clean glass or ceramic bowl with a clean spoon. Wash your hands first. Dirty tools can push bacteria into your pores.
Rice Brightening Jam Face Mask →
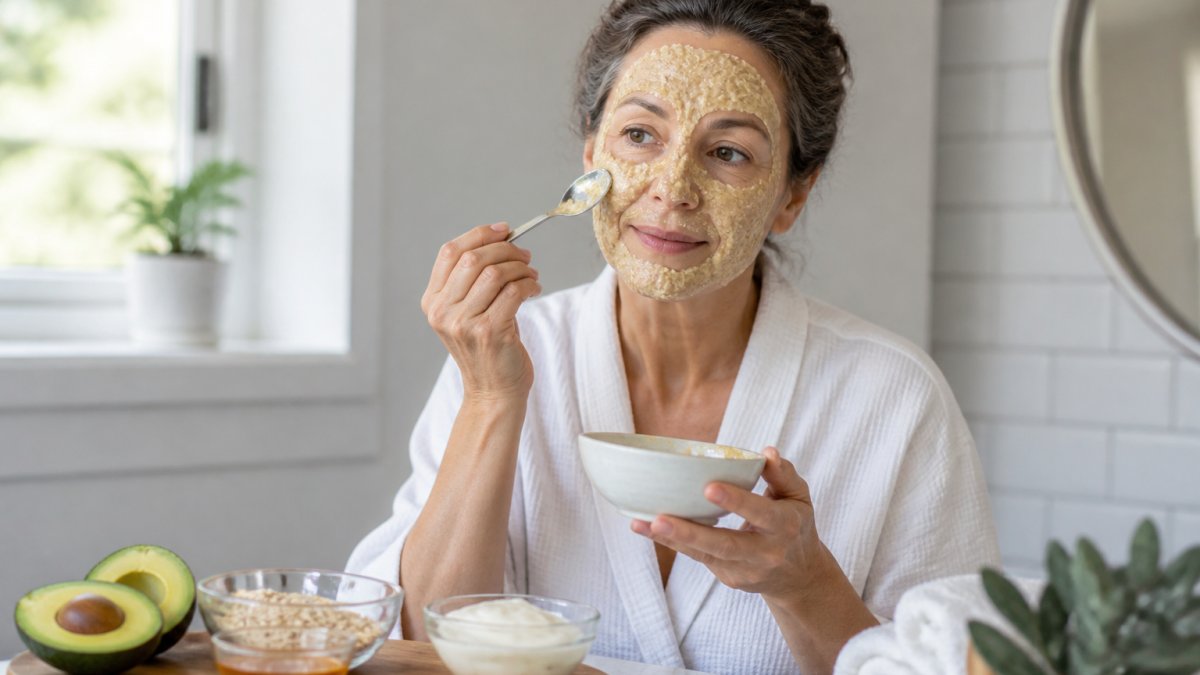
Follow these steps every time:
- Wash your face with a gentle cleanser and pat dry.
- Mix only what you need for one use.
- Apply an even layer, avoiding the eyes and lips.
- Leave on for 10 to 20 minutes. Do not let it fully dry and crack.
- Rinse with lukewarm water and pat dry.
- Follow with moisturizer to lock in hydration.
Storage rules: Fresh masks spoil fast. Keep leftovers sealed in the fridge no more than 2 to 3 days, and throw away anything that smells off.
How Often to Use a Face Mask for Best Results
Most people should use a face mask once or twice a week; more can overload sensitive or dry skin.
Here is a simple guide:
| Skin Type | How Often | Best Mask Type |
|---|---|---|
| Dry skin | Once a week | Avocado and rosehip |
| Oily skin | Twice a week | Yogurt and oatmeal |
| Sensitive skin | Once a week | Honey and oatmeal |
| Mature skin | 1-2 times a week | Rotate all three |
If your skin feels tight, red, or irritated after a mask, wait a week before trying again, or cut back to once every 10 days if it stays reactive.
Pair masks with a steady routine: cleanse, moisturize, and wear sunscreen daily. That foundation does more for fine lines than any single mask.
Face Mask Patch Test: A Step You Should Never Skip
A patch test is the single most useful thing you can do before a homemade mask. It takes about 24 hours, costs nothing, and catches most reactions before they spread across your face.
A patch test looks for two reactions that behave differently:
- Irritant contact dermatitis shows up fast, minutes to a couple of hours, as stinging, burning, tightness, redness, or scaly patches. It is a direct chemical injury to the skin barrier, not an allergy, and worsens the longer the ingredient sits on your skin.
- Allergic contact dermatitis is delayed, appearing 24 to 72 hours after contact as itching, bumps, blisters, or a spreading rash. Once sensitized, even a tiny amount can trigger a reaction next time.
That delay is why a 15-minute test on your arm is not enough on its own. You need the wait period.
How to Run a Proper Patch Test
- Mix a small batch exactly as you would use it, including every ingredient.
- Wash and dry a small area on your inner forearm or behind your ear.
- Apply a dime-sized amount and leave it for the full mask time (10 to 20 minutes).
- Rinse with lukewarm water and pat dry.
- Leave the area alone for 24 hours, no moisturizer, sunscreen, or other products.
- Check at 24 hours, then again at 48 to 72 hours, noting any redness, itching, bumps, or swelling.
If the area is clear at 72 hours, the recipe is likely safe for your face. If you see a reaction, skip that recipe, wash with gentle cleanser and cool water, apply a plain fragrance-free moisturizer, and let your skin settle for a few days.
Ingredients That Trigger Reactions Most Often
Some ingredients cause problems far more often than others. Patch test these with extra care, or skip them entirely if your skin is reactive:
- Citrus juices and peels (lemon, lime, orange, grapefruit), irritating and phototoxic, causing a burn-like reaction when skin is later exposed to sunlight.
- Essential oils, especially undiluted cinnamon, clove, oregano, thyme, eucalyptus, and citrus. Even "natural" oils can be potent allergens.
- Turmeric and cinnamon powder, common causes of stinging and redness; turmeric can temporarily stain skin yellow.
Honey, plain yogurt, colloidal oatmeal, and avocado trigger reactions far less often, which is why they appear in so many beginner recipes. Still, no ingredient is risk-free for everyone.
Warning Signs That Mean Stop Immediately
Rinse the mask off right away and do not reapply if you notice:
- Burning, stinging, or pain that does not fade within a minute or two
- Spreading redness or swelling
- Hives, blisters, or weeping skin
For mild irritation, cool compresses and a bland moisturizer usually help within a day or two. If a reaction is severe, spreading, or not improving after 48 hours, contact a healthcare provider.
When to Choose a Ready-Made Anti-Aging Face Mask Instead
A ready-made anti-aging face mask wins when you want consistent results, tested formulas, and no mixing. DIY masks vary every time you make them.
Choose a store-bought mask if:
- You have sensitive skin and need a gentle, tested formula.
- You want specific anti-aging ingredients in a set amount.
- You are short on time and want zero prep.
Our top picks at Ageless Glow:
- Rice Brightening Jam Face Mask ($79.99): rice extract helps brighten dull skin and improve texture. It suits all skin types and spreads easily.
- Centella Cica Soothing Sheet Mask ($46.99): Centella Asiatica calms redness and supports the skin barrier. Ideal for sensitive skin.
- Deep Pore Hydrating Mud Mask ($68.99): draws out impurities while keeping skin hydrated. Made with 91.8% nature-derived ingredients.
Each one skips the guesswork, the same formula every time.

The U.S. Food and Drug Administration's guidance on cosmetics notes that cosmetic makers must ensure their products are safe, which is one reason tested formulas offer more consistency than kitchen mixes.
Conclusion
Building a mask routine that works takes patience, and mixing the wrong ingredients can set your skin back weeks.
Ageless Glow makes it simpler. Our targeted skincare line pairs nutrient-rich formulas with beauty tools and facial devices for visible results on fine lines, dark spots, and hydration, effortless radiance, no synthetic guesswork, no messy prep.
Get started with Ageless Glow and give your skin the consistent, visible care it deserves.
Frequently Asked Questions
Can a face mask remove wrinkles?
No mask erases established wrinkles, and any product claiming that is overselling. What anti-aging face masks can do is hydrate the skin so fine lines look softer, support the skin barrier, and improve texture and tone over time. Think of them as one helpful step in a routine, not a replacement for sunscreen, retinoids, or in-office treatments if deeper lines are your main concern.
How often should I use a DIY face mask?
Once or twice a week suits most skin types. Dry or mature skin can often handle two sessions, while oily or sensitive skin may do better with one. If you notice redness, stinging, or flaking, cut back to every other week. Rotate between a hydrating recipe and a gentle exfoliating one rather than using the same mask every time, and always follow with moisturizer.
Are natural face mask ingredients safe for sensitive skin?
Many are, but natural does not automatically mean gentle. Citrus juice, cinnamon, essential oils, and undiluted apple cider vinegar commonly trigger irritation. Start with bland ingredients like oatmeal, plain yogurt, honey, or avocado, and always run a face mask patch test on your inner forearm 24 hours before applying anything to your face. If you have rosacea or eczema, check with a dermatologist first.
How long should I leave a homemade face mask on?
Ten to fifteen minutes is the standard window for most DIY recipes. Clay-based masks dry out faster, so rinse at 10 minutes or when the mask still feels slightly tacky, not cracked. Leaving a mask on longer does not increase benefits and can pull moisture from the skin, especially for mature or dry skin types. Rinse with lukewarm water and moisturize immediately while skin is still damp.