

Last Updated: November 3, 2026
Quick Summary
To use an electric eye massager for puffy eyes, cool the under-eye area first, then run the device on its lowest setting in slow passes from the inner corner toward the temple for about 10 to 15 minutes per session. An electric eye massager may make puffiness look less noticeable for a few hours, but it does not treat the underlying causes.
- Run a 2 to 3 minute cooling pass before any vibration or pressure.
- Start on the lowest vibration or pressure setting and position the device along the brow bone, off the eye.
- Make 3 to 5 slow passes per side, each lasting 5 to 10 seconds.
- Stop and see a doctor if swelling is new, painful, one-sided, or persistent.
Table of Contents
- What the Evidence Does and Does Not Show
- Before You Start: Preparing Your Skin and Device
- Step-by-Step Routine for Using an Electric Eye Massager on Puffy Eyes
- How Often Should You Use an Eye Massager?
- Eye Massager Side Effects, Contraindications and When to Stop
- Choosing a Tool for Dark Circles and Puffiness Together
- Start Your Puffiness Routine With the Right Eye Care Products
- Frequently Asked Questions
Puffy eyes in the morning are one of the most common complaints people bring to a skincare routine. An electric eye massager is a popular tool for this, and This guide explains how to use an electric eye massager for puffy eyes, step by step, and what results you can realistically expect.
Electric eye massagers use gentle vibration or light pressure to move fluid in the under-eye area. Many people use them with an eye cream to help the product feel smooth and comfortable. The short answer is that they may help with the look of puffiness for a while, but they are not a cure.
What the Evidence Does and Does Not Show
Most of the claims around eye massagers come from product marketing, not from large clinical studies. Research on massage and lymphatic drainage is limited, and results vary from person to person. Puffiness often comes from sleep, salt intake, allergies, or fluid shifts, and a massager does little to change those causes.
A useful way to think about it: a massager can make the skin feel refreshed and can make the eye area look less swollen for a short time. It is not a substitute for a doctor's advice if swelling is new, painful, or on one side only.
Before You Start: Preparing Your Skin and Device
Preparation is where most puffiness routines succeed or fail, because an electric massager behaves differently from a manual roller. A powered device applies its own pressure and motion, so fit, contact-surface cleanliness, and mode selection matter before you touch your face.
Clean the contact surfaces first. Wipe the inner mask or massage head with a dry or lightly damp microfiber cloth before each use. Most manufacturers advise against soaking powered eye devices or running them under a tap, so follow the manual for your model.
Fit the device before you power it on. Powered eye masks are designed to sit against the brow and cheekbone, not on the eyelid. Adjust the strap so the inner surface rests lightly around the orbital rim and the eye itself is clear. If the device presses on your eyelashes or feels tight across the bridge of the nose, loosen it.
Prep the skin. Wash your face and pat it dry. Remove eye makeup, because residue can drag against the skin during vibration. Remove contact lenses unless your device manual says otherwise; even when the lenses are technically clear of the device, the vibration and any cream you apply can shift them.
Choose a starting mode. Most electric eye massagers offer some combination of vibration, air pressure, heat, and cooling. For puffiness, start with the lowest vibration or pressure setting and the cooling mode if your device has one. Heat can feel relaxing, but it may not suit sensitive skin. Save heat for an evening wind-down session rather than a morning depuffing routine.
Check the contraindications before the first session. Skip the device if the skin around your eyes is broken, sunburned, or raw, and do not use it over an active stye, infection, or recent eye procedure without clearing it with your eye doctor. People with glaucoma, retinal conditions, or a history of eye surgery should ask their ophthalmologist before using any pressure-based eye device.
- Wash your hands before handling the device
- Remove eye makeup and contact lenses
- Wipe the contact surfaces and let them dry
- Adjust the strap so the device clears the eye itself
- Apply a thin layer of eye cream or massage gel
- Start on the lowest vibration or pressure setting
Step-by-Step Routine for Using an Electric Eye Massager on Puffy Eyes
This routine is written for a powered eye massager rather than a manual roller, so it covers mode order, session timing, and aftercare. Exact controls vary by model, but the sequence below works for most vibration, air-pressure, and cooling devices.
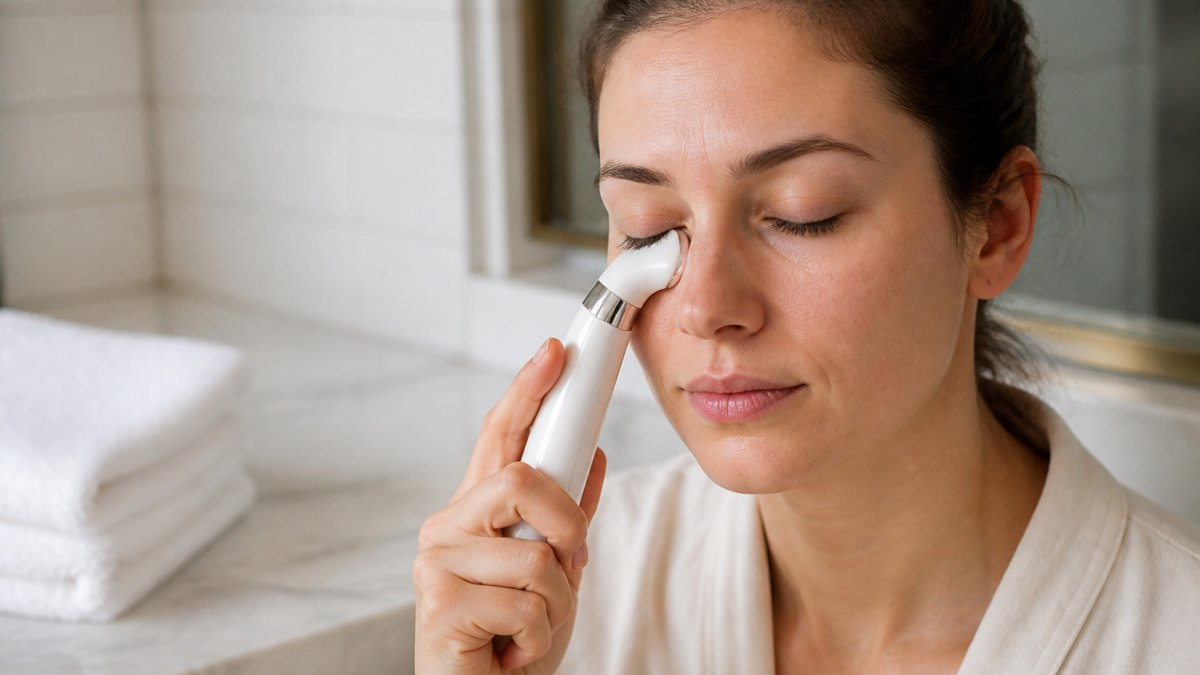
- Start with cooling, if your device has it. Run a 2- to 3-minute cooling pass before any pressure or vibration. Cool temperatures can temporarily make the under-eye area look less swollen. If your device has no cooling mode, a chilled spoon or a cold gel pack held gently under the eye for 1 to 2 minutes works as a substitute.
- Move to the lowest vibration or air-pressure setting. Sit upright or lie back with your head slightly elevated. Close your eyes and let your face relax before you start the motor. Starting low lets you judge whether the pressure feels comfortable before you commit to a full session.
- Position the device around the orbital rim, not on the eye. The inner edge of a powered mask should sit along the brow bone and upper cheekbone. If you are using a handheld electric massager, place the head near the inner corner of the eye and keep it off the eyeball itself.
- Work outward along the under-eye bone. Use slow, gliding passes from the inner corner toward the temple, about 5 to 10 seconds per pass. Light pressure is enough; the goal is to encourage fluid movement, not to press fluid into the tissue. Air-pressure masks typically cycle on their own, so let the device do the work rather than pressing it harder against your face.
- Repeat 3 to 5 passes per side, then stop. A full session usually runs 10 to 15 minutes including the cooling pass. Many devices have an automatic shutoff at 10 or 15 minutes; treat that as the ceiling, not a target to exceed.
- Finish with a cool pass and gentle aftercare. If your device has a cooling mode, end with 1 to 2 minutes of cool. Pat, do not rub, any remaining cream into the skin, and clean the contact surfaces before storing the device.
Watch out: if you feel pulling, stinging, or a headache coming on, stop the session. Pressure that is too high or a strap that is too tight can cause discomfort that has nothing to do with puffiness.
Choosing Settings for Puffiness
For puffiness specifically, the mode order matters more than the intensity. Cooling first, then low vibration or air pressure, gives the best chance of a visible temporary improvement. Higher vibration settings do not depuff better; they mainly increase stimulation and the risk of irritation on thin under-eye skin. Heat is better saved for evening relaxation sessions, and it should be skipped if your skin is sensitive or you are prone to broken capillaries.
If your device offers adjustable air pressure, choose the lowest level that still feels like it is making contact. Track your settings for a week so you know what actually made a difference.
Aftercare and Realistic Expectations
Clean the contact surfaces after every session, let them dry fully, and store the device in its case or a clean drawer rather than loose in a bathroom cabinet. Replace removable covers according to the manufacturer's schedule.
Results are temporary. A massage session can make the under-eye area look less puffy for a few hours, but it does not change the causes of puffiness, sleep, salt intake, allergies, or fluid shifts. The evidence for device-based lymphatic drainage is limited. Use the routine as a short-term cosmetic refresh, and see a doctor if swelling is new, painful, one-sided, or persistent.
The routine follows a clear order, from cooling to aftercare, with timings you can follow at home.
| Step | What to do | Time or frequency |
|---|---|---|
| Cooling pass | Run cool mode, or hold a chilled spoon or gel pack | 2-3 minutes |
| Low setting | Start on the lowest vibration or pressure | Before full session |
| Positioning | Place along the brow bone and cheekbone, off the eye | Once per session |
| Working passes | Slow glides from inner corner to temple | 5-10 seconds per pass |
| Repeat | 3-5 passes per side | Full session 10-15 minutes |
| Finish | Cool pass, pat in remaining cream | 1-2 minutes |
How Often Should You Use an Eye Massager?
Many people use an eye massager once a day, often in the morning to help with puffiness, or at night to unwind. Using it once or twice a day is common, but more is not always better. Overuse can irritate delicate skin.
Watch how your eyes respond over a week or two. If puffiness improves and your skin stays calm, you can keep the routine. If your skin becomes red or itchy, cut back.
Eye Massager Side Effects, Contraindications and When to Stop
Mild redness and temporary tenderness can happen, especially with new users. Stop using the device if you notice any of the following:
- Persistent redness, rash, or itching
- Burning or stinging that does not fade
- Eye pain, vision changes, or swelling that spreads
- Skin infections, cuts, or open sores
Do not use an electric eye massager near an active eye infection or after recent eye surgery without asking your doctor first. People with eye conditions, skin conditions, or a history of retinal problems should check with an eye doctor before starting.
For mild irritation, calm the skin with a gentle routine and avoid the massager for a few days.
Choosing a Tool for Dark Circles and Puffiness Together
Dark circles and puffiness often show up together, but they have different causes. Puffiness is usually fluid, while dark circles can come from thin skin, pigment, or shadowing. A massager may help with puffiness, while brightening products are often better suited to dark circles.
If you want one tool for both concerns, pick a gentle device and a cream designed for the under-eye area. Explore a targeted eye routine to see how cream and massage can work together.

Start Your Puffiness Routine With the Right Eye Care Products
Start simple. Use a gentle massage a few times a week, track how your eyes look, and adjust from there. Consistency matters more than intensity.
If you are ready to build a routine, the Instant Firm Eye Tightener Cream is designed to help firm and refresh the under-eye area. Pair it with careful massage technique and realistic expectations, and you will get the most out of your eye care routine.

Frequently Asked Questions
Do eye massagers help with puffy eyes?
Eye massagers can help puffy eyes look less swollen in the short term, mainly because gentle massage and any cooling function may encourage fluid to move away from the under-eye area. Results are usually temporary and vary between people. Puffiness is often linked to sleep, salt intake, allergies or fluid retention, so a massager works best as one part of a routine rather than a standalone fix. Use light pressure and stop if you feel discomfort.
How often should you use an eye massager?
Most people use an electric eye massager once or twice a day for about 10 to 15 minutes. Many find morning use helps with puffiness after sleep, while evening use before bed supports relaxation. Start with once a day for the first week to see how your skin responds. Using it more often does not speed up results and can increase the risk of irritation, so stick to the frequency in the product instructions.
Can electric eye massagers cause skin irritation or side effects?
Irritation is uncommon but possible, especially if the device is used with too much pressure, on broken or very sensitive skin, or with a product that irritates you. Stop using the massager if you notice redness, stinging, itching or increased swelling. Avoid use on skin with active rashes, infections or recent injury, and check with a dermatologist or eye doctor first if you have eye conditions, recent eye surgery or eyelid problems.
Should you apply eye cream before or after using an electric eye massager?
Apply a thin layer of eye cream before using the massager. The gel or cream helps the device glide smoothly and supports absorption during the vibration. The Electric Massage Eye Cream from Ageless Glow is designed for use with its built-in vibrating applicator, priced at $31.99. Wipe away any excess product after your session so it does not get into your eyes.
